Week 1
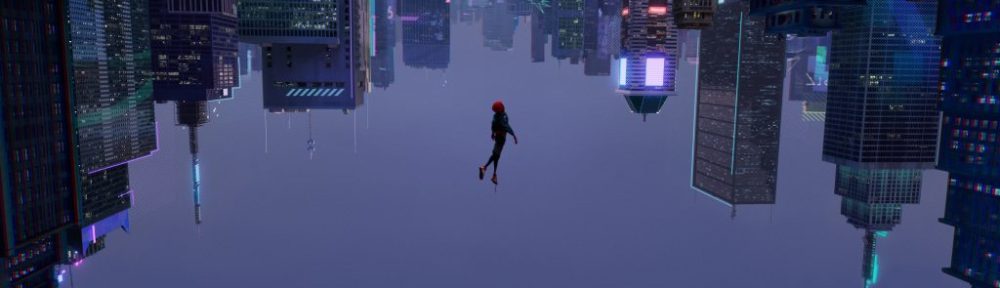
To begin with for my final major project I wanted to tie in my dissertation with my project. As I had previously created a planar 2D animation in Maya for the preceding unit, I decided that investigating the merging of different animation styles could be a good starting point – combining multiple different stylistic characters into one cohesive project. There have been several pieces of recent animation media that I enjoyed that utilised this practise such as “Into The Spiderverse”, “Klaus”, and “Chainsaw Man” that inspired the project.
Later, I decided that the project would probably be a bit too much work, so I started looking for other sources of inspiration for a project. As I have already written an essay looking into stop-motion, I considered it an interesting prospect to create a project with some relation to stop-motion in a 3D based workflow. I settled on framerate, as I feel like that is one of the key features of stop-motion animation, setting it apart from other animated mediums. I thought that I could use different frame rates in my project, similar to “Into the Spiderverse”, using the frame rate changing to portray how a character feels or how good they are at something.
I also thought that skateboarding would be a good way to show this – showing skateboarding at different framerates to show different mastery levels. I decided to then write a storyboard with a basic story idea which slowly evolved over a couple iterations.
Week 2
During this week I considered what I would want the characters to look like and whether I wanted to create my own characters and rigs or use premade ones. I decided that I would rather use someone else’s rig – though I can rig characters, I cannot rig to the same standard that a professional rigger can and this can make the animation worse as I previously found on another project I made, the rig would sometimes deform strangely and there was little I could do to fix it.
Also, this meant that I would have more time for animation, which I thought was useful as the job that I would like in the future is in character animation, not rigging. Therefore, I didn’t think rigging was a good use of my time as though it could make my character more visually different and interesting than a fairly basic rig character that many people have access to, it would not be a good idea when the idea of my project is partly to showcase animation ability.
I began searching for good rigs, and found the David rig made by Gabriel Salas. I had tried a few different rigs before this one, but found this rig most suitable and nice to use and animate with, with good functionality and a lot of potential for expression.
Week 3
I decided to begin thinking about the environment and what I could use for this. Obviously it would be set in a skate park, but there are a lot of different types. Often skate parks are either indoor skateparks that are paid to go to, or outdoor skate parks that are free. Due to the story having the main character go to the skatepark late in the evening when an indoor park might not be open, I chose to use an outdoor skatepark. Skate parks are associated with suburban areas usually – though cities obviously have skate parks too I tend to in my head associate them with the suburbs.
I found an HDRI that I applied to a skydome that had an appropriate park setting that could realistically fit my skating project – the park has several buildings nearby and other park features, so it fits well with the project environment.
I also had to decide here what kind of objects I’d like in my skatepark. I decided to make the skatepark a square as I felt this was easier to build around and allowed for me to add different models modularly. The main model was the half pipe ramp that the main character spends a lot of time on, but I researched other skatepark objects such as ramps, bowls, rails, etc.
Week 4
I started the modelling environment process – with multiple ramps and reference images of different skateparks. I tried a few different iterations of my skate park, some with bowls, rails, ramps, etc in different areas but eventually settled on a more simplified design. I modelled the environment props in Maya as well as UV unwrapping them, and textured them using Substance Painter. For the graffiti on the ramps I used an AI image generator that works off prompts, inputting existing graffiti style images and giving the generator prompts of what I wanted the graffiti to include (such as the mouse and the elephant on the ramp).
Week 5
I was considering using Unreal Engine to render my project, as I had thought this might be a better way to quickly render in higher quality given the limitations I have of only being able to render on my own machine. However, when I followed a tutorial to export my animations from Maya to Unreal, I found issues that would break the rig for some reason. Therefore, I just decided that I would use Arnold as my renderer and render at 720p instead of 1080p to allow myself enough time for rendering. I began texturing the ramps and other objects in substance. I used Dream.ai to AI generate graffiti style art that I applied to my ramps, to avoid copyrighted material as well as gaining some control over the aesthetic of the art and the content (for example the animals generated below).
Week 6
For the skateboard I decided I wanted to model and rig my own model as the available resources online did not have what I wanted – they didn’t seem suitable for my project. Therefore I modelled the skateboard in Maya and textured it in Substance, then followed a YouTube tutorial to rig the wheels to turn with the main body movement of the skateboard.
Week 7
I needed another rig for my child character in the project, so I found some initially on ProRigs.com. Unfortunately they were only useable on Maya 2020 and previous versions and my project was on Maya 2022, so I used a different rig called the Kayla rig that I found on Gumroad. I modelled a skate helmet for this character to make it more suitable for the project and parented it to the rig.
Week 8
I began positioning my cameras for each shot that I would make and considering where I would place my character in each shot. I animated the cameras that would have movement though this was not many – most of my shots were stationary.
Week 9
This week I was collecting references. I filmed several of the references myself for closeup body movements and emotions as I felt this was the best way to get the right reference for the camera angles I wanted and specific sequences I wanted to animate. For the skateboarding scenes I mostly used YouTube tutorials for learning to skate, including videos on dropping in off ramps, a failed drop in, and a kickflip. Converting these sequences from YouTube into image sequences and retiming them to 24fps allowed me to import the videos into Maya as image sequences that would play along with my animated rigs, and I could half screen my Maya viewport with half the screen being the reference, and half being the scene I was working on. This allowed for me to easily find the key poses of each shot and pose my character based on reference, giving me 90% of the positioning and timings for each shot, with the last 10% involving me tweaking the graph editor and slight timing and positioning adjustments to make the animations closer to what I had in mind.
Week 10
I started animating the scenes, blocking out larger movements with the COG controller initially and slowly focusing on more of the different body parts like the arms and legs. I tried to focus on the more important movements first such as the areas where the characters skated around, as I wanted to make sure these were animated smoothly.
Week 11
I tweaked the graph editor to fix the areas that were off, and fix any parts of the animation curve that were incorrect. This week was also useful to retime my animation to look more realistic, as some parts were too slow. Using reference helped to fix any animations that looked like they were the wrong speed.
Week 12
During this week I polished the final touches to the animations, and made sure that they were to a standard that I was happy with (though due to some time limitations I would’ve preferred to add more smaller secondary animations such as more advanced finger movement). I also added some effects to the cameras in this week such as setting the depth of field, creating measure objects to keep the focus of the camera as the distance between the camera and the focus object.
Week 13
I began this week by setting up render settings – making sure that I had the Optix Denoiser on and working for each shot. I decided to render at 720p due to time constraints (1080p would have been ideal but also would’ve taken too long). Some of the shots were rendered in 12 and 16 fps compared to the usual 24fps as this was a large part of my visual aesthetic (to have lower frame rates in parts of the animation).
Week 14
I started the video editing process, importing my footage as image sequences and interpreting them at 24 frames per second. As some of the footage was rendered at different frame rates (with some at 12, some at 16 and some at 24), when placing the image sequences into Premiere Pro, they needed to have their speed/duration edited. The 12 fps image sequences were at a multiplier of 200%, 16 fps at 150% and 24 at the standard 100%. Some interpolation was added by default in Premiere Pro, though I didn’t feel like this detracted anything from the project. I also created a title sequence and credits during this week, finding a tutorial on how to make text jitter on YouTube.
Week 15
In the final week I began adding sound effects and music to my animation. I used free sound websites to find my audio, and browsed music on the free stock music page. I needed to adjust several of the audio clips to play at the right volume compared to the music and other audio, and tried to roughly match the music to the timings of the animation. I adjusted some other settings on the audio too to match other clips such as pitch for some of the vocal sound effects.
I then rendered out my project as an MP4 and finished my work.